
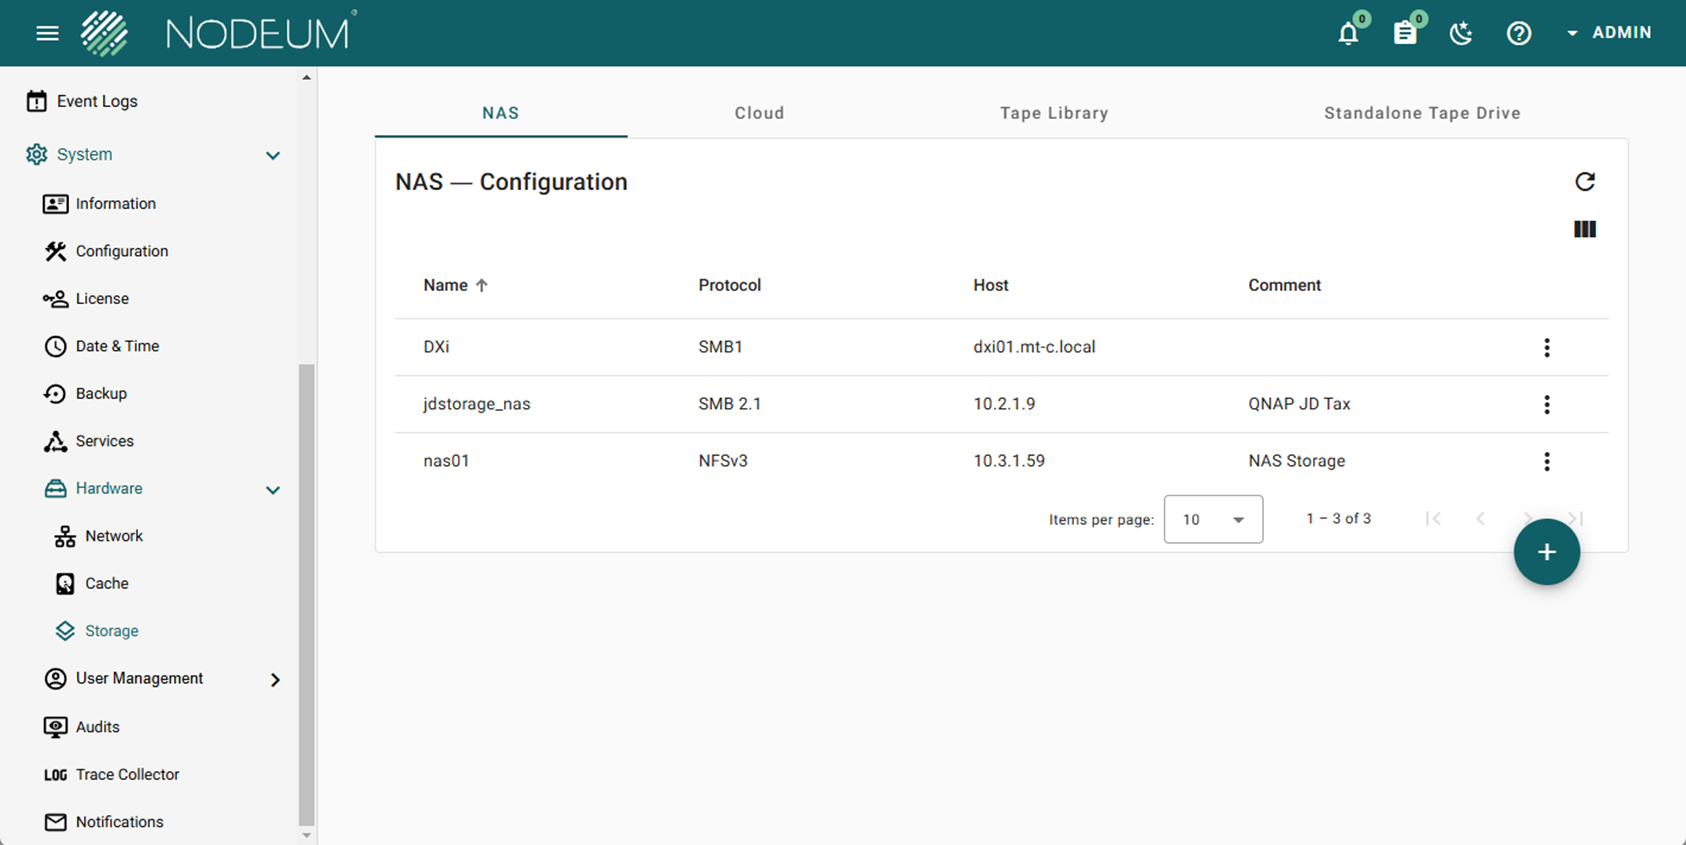


| Parameters | Definition |
|---|---|
| Name | Complete the name of the storage |
| Comment | |
| Protocol | Choose the protocol SMB or NFS |
| Version | Choose the version of the protocol For SMB : Version 1 - 2.1 and 3.0 For NFS : Version 3 - 4 |
| Host | Complete the Hostname |
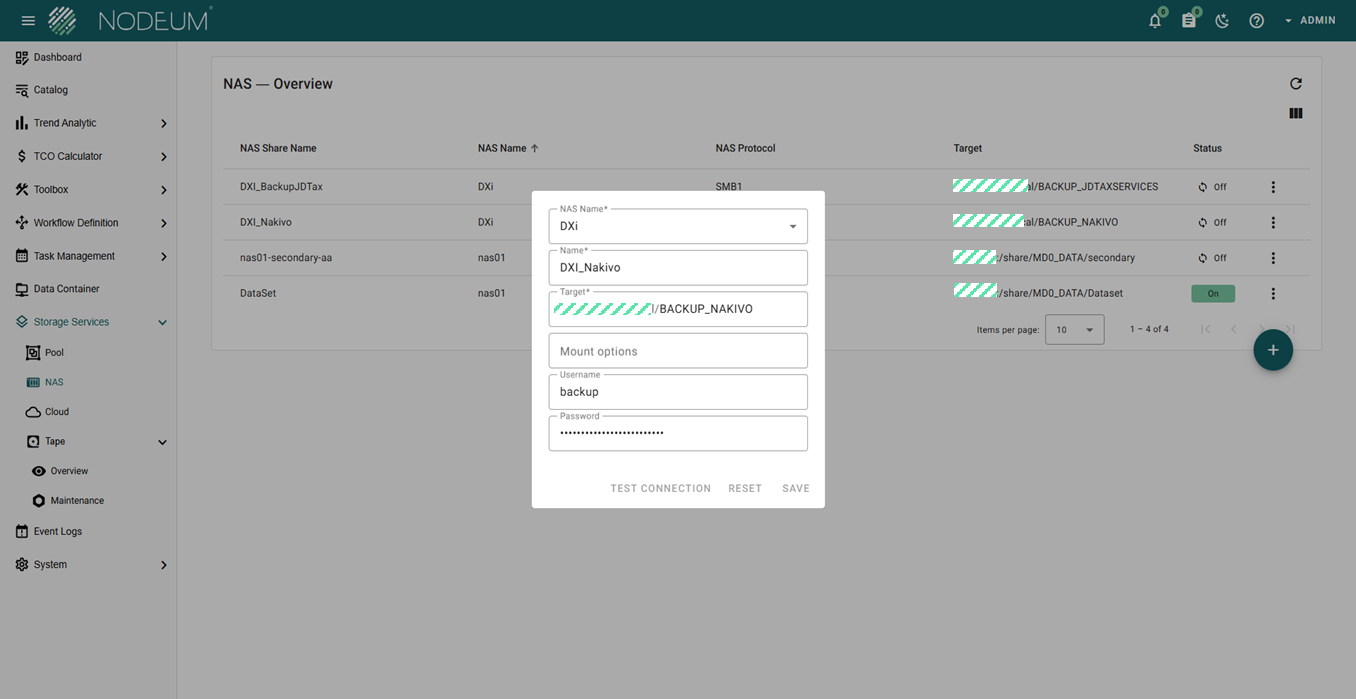
Nas Target
| Parameters | Definition |
|---|---|
| Name | Complete the name of the storage |
| Comment | |
| Protocol | Choose the protocol SMB or NFS |
| Version | Choose the version of the protocol For SMB : Version 1 - 2.1 and 3.0 For NFS : Version 3 - 4 |
| Host | Complete the Hostname |

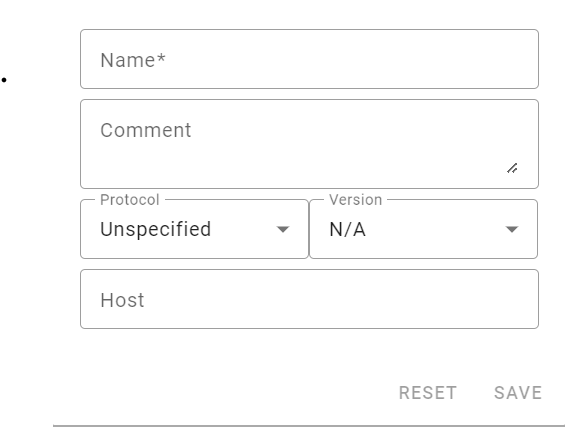
| Parameters | Definition |
|---|---|
| Name* | Complete the name you define in the toml (ansible playbook) |
| Comment | |
| Protocol | Choose unspecified (+++ Mandatory) |
| Host | Complete the Hostname |
| Parameters | Definition |
|---|---|
| NAS Name* | Select the NAS |
| Name* | Give a name for your target |
| Target | Use the target Path |
| Mount Options | |
| Username | |
| Password |
| Status | Definition | Comments |
|---|---|---|
 | NAS is Online | |
 | NAS is Offline | To reconnect the NAS, just push on the button to refresh the connection |